Distribution center design is the work of arranging a building’s receiving, storage, picking, packing, and shipping areas so product moves from the inbound dock to the outbound dock in the fewest touches and the shortest distance. It covers the flow pattern, how much space each area gets, where the docks go, how wide the aisles are, and where conveyor, sortation, and storage equipment sit.
Good distribution center design starts from your data: what you receive, how you store it, how orders look, and when trucks leave. The building shape and equipment come after. This guide walks through the main areas of a distribution center, the three common flow patterns, a seven-step layout method, and the mistakes that cost the most to fix after the racking is up.
At a glance
- Six core areas: receiving, put-away and storage, replenishment, picking, packing and value-added services, and shipping.
- Three flow patterns: U-shaped (docks on one wall), through or I-shaped (receiving and shipping on opposite walls), and L-shaped (docks on adjacent walls).
- Design from data: inbound units, SKU count and velocity, order profile, and carrier cutoffs set the space each area needs.
- Plan the docks and staging first. They’re the hardest to change later.
- Leave room to grow: clear height, power, and open floor for future lines or mezzanines.
Table of Contents
What Distribution Center Design Covers
Distribution center design answers three questions. What has to happen to each unit between the inbound trailer and the outbound trailer? How much space and equipment does each step need at peak? In what order should the areas sit so product never backtracks?
Distribution center design overlaps with two narrower jobs. Building design (the shell, slab, roof, and fire protection) usually belongs to the architect and developer. Material handling design (the conveyor, sortation, storage, and controls) belongs to the integrator. Distribution center design sits between them, and the best results come when both groups work from the same flow plan early. Century’s system design services start at that stage: site selection, facility sizing, and equipment recommendations based on the layout.
The Six Core Areas of a Distribution Center
Every distribution center design works with some version of these six areas. Their size and order change with the business.
Receiving
Trailers are unloaded, cartons or pallets are checked against purchase orders, and labels are applied. Receiving needs dock doors, unloading equipment, staging space, and room to inspect and correct problems before product enters storage. Cross-dock freight, which skips storage and goes straight to shipping, also starts here.
Put-away and storage
Product moves from receiving to reserve storage: pallet racking, shelving, carton flow, or automated storage. The storage method follows the product. Full pallets of fast movers suit selective or drive-in rack. Slow movers in small quantities suit shelving. Our types of pallet racking guide covers which rack fits which inventory.
Replenishment
Reserve stock refills forward pick locations. Replenishment needs its own path, ideally from the back of carton flow or from a separate aisle, so restocking doesn’t block pickers.
Picking
Orders are filled from forward pick locations. Picking is usually the most labor-heavy area in the building, so its place in the distribution center design, and the pick method, have the biggest effect on cost per order. Our zone picking guide compares zone, batch, wave, and discrete picking.
Packing and value-added services
Orders are checked, packed, sealed, weighed, and labeled. Kitting, gift wrap, returns processing, and other value-added work often sits nearby.
Shipping
Cartons or pallets are sorted to outbound doors, staged by route or carrier, and loaded. Shipping needs doors, sortation or staging lanes, loading equipment, and room to stage a full trailer before it arrives.
Distribution Center Layout: Three Flow Patterns
The flow pattern decides where receiving and shipping sit relative to each other. Everything else in the distribution center design arranges itself between them.
| Flow pattern | Dock arrangement | Strengths | Trade-offs | Often fits |
|---|---|---|---|---|
| U-shaped | Receiving and shipping on the same wall | Shared doors and dock staff; fast movers can sit near both docks; easy cross-docking | Dock wall can get crowded; inbound and outbound traffic mix | Most mid-size DCs; operations with heavy cross-dock or shifting inbound/outbound mix |
| Through (I-shaped) | Receiving on one wall, shipping on the opposite wall | Straight-line flow; inbound and outbound fully separated; room for many doors | Every unit travels the full building length; harder to share doors | High-volume operations; long, narrow buildings; cross-dock buildings |
| L-shaped | Receiving and shipping on adjacent walls | Separates traffic with less travel than through-flow | Corner congestion; less common, so fewer standard building options | Sites where truck access only works on two adjacent sides |
U-shaped flow
Product enters and leaves on the same side of the building. Fast movers sit closest to the dock, and slow movers go deeper into the building. Doors can switch between inbound and outbound as volume shifts during the day. The risk is congestion on the dock wall, so a U-shaped distribution center design needs careful planning of staging space and traffic lanes.
Through (I-shaped) flow
Product enters one end and leaves the other. Inbound and outbound trucks, yards, and staff never cross. In distribution center design, through-flow suits buildings with a high door count and operations that move a lot of freight straight from receiving to shipping. The cost is travel: even a fast mover crosses the whole building.
L-shaped flow
Receiving and shipping sit on two adjacent walls. It usually comes from site limits, such as a road on one side, rather than choice.
Building shape and site access often decide the pattern before the detailed distribution center design starts. That’s one reason Century’s design team helps validate a site before you buy, lease, or build.
How to Design a Distribution Center: 7 Steps
These steps follow the order an integrator works in. Skipping ahead to equipment before the data is settled is the most common reason distribution center design runs over budget.
Step 1: Gather the operating data
Pull at least a year of history, including your peak season:
- Inbound volume by day: trailers, pallets, cartons, and how they arrive (floor-loaded or palletized)
- SKU count, with velocity by SKU (lines picked, not just units sold)
- Product size, weight, and handling needs (crushable, temperature, hazmat)
- Order profile: orders per day, lines per order, units per line
- Outbound mix: parcel, LTL, truckload, store routes, will-call
- Carrier cutoff times and dock schedules
Step 2: Set the design year and growth
Every distribution center design needs a design year: the year the building has to support, and how much growth to plan for. Century sizes facilities by reviewing past, current, and future needs, so the building doesn’t run out of room the year it opens.
Step 3: Map every process step
Walk each product type from trailer to trailer. Write down every touch, scan, and move. This process map becomes the backbone of the distribution center design: the list of areas and the order they connect. It also exposes steps that can be removed, such as a manual re-label that automatic labeling at receiving would replace.
Step 4: Size each area
Turn the data into space. Storage positions come from inventory on hand at peak. Pick faces come from SKU count and velocity. Dock doors come from trailers per hour at peak plus loading and unloading time. Staging comes from how much freight waits for a door or a truck. Each area is sized for peak, with a planned way to flex labor at slower times.
Step 5: Choose the flow pattern and arrange the areas
Pick U-shaped, through, or L-shaped flow, then place the areas so product always moves forward. Put the fastest movers closest to their next step. Keep pedestrian and forklift traffic apart where you can. Leave space for building columns, fire lanes, and exit routes before you place anything else.
Step 6: Select the material handling equipment
Now choose conveyor, sortation, storage, and controls to connect the areas at the required rates.
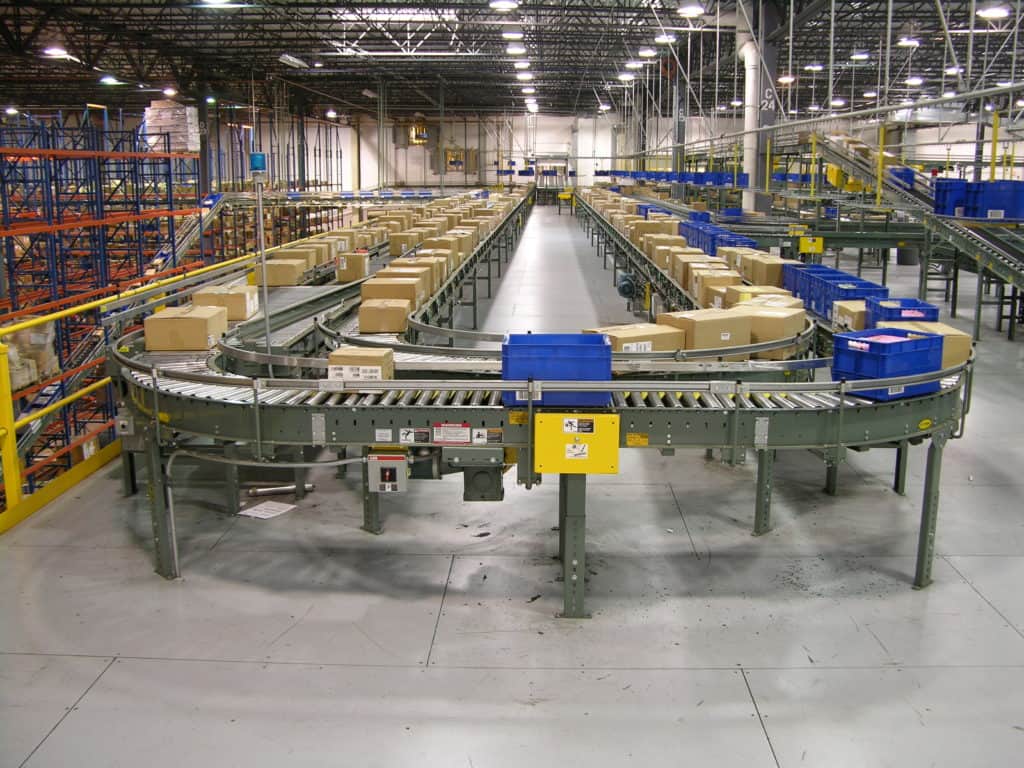
This is where the throughput, speed, and buffer calculations happen. Our conveyor system design guide covers the seven numbers to settle before a conveyor layout is drawn.
Step 7: Draw, test, and revise
The integrator turns the plan into AutoCAD layouts and, where it helps, a simulation or demonstration. Expect revisions. In an earlier article, Century noted its record is 97 rounds of drawing revisions before a design was settled. Every round of distribution center design on paper is cheaper than a change in steel.
Dock and Staging Design
Docks and staging are the hardest part of any distribution center design to change once the building is up, so they deserve the most attention early in distribution center design.
- Count doors for peak, not average. Size inbound and outbound doors from your busiest day, including the time each trailer spends at the door.
- Match unloading equipment to how freight arrives. Floor-loaded cartons call for different equipment than palletized freight. Extendable conveyors reach into the trailer and cut walking and lifting. Our telescopic conveyor guide explains the options.
- Give staging real space. Freight waiting for a door or a truck needs marked lanes that don’t block aisles or exit routes.
- Plan the yard with the building. Truck court depth, trailer parking, and gate location limit how many doors you can actually use.
Salson Logistics, a port-to-shelf 3PL, shows how receiving design changes capacity. Before Century’s system, Salson applied labels, scanned, and sorted by hand, and reached up to 20,000 cartons a day. Century installed five traversing trailer unloaders that each serve multiple inbound doors, scan tunnels on each pair of receiving lines at 16 cartons a minute per location, and accumulation that merges five lanes into a 95-carton-per-minute flow to a bi-directional sorter. The sorter feeds 33 hand palletizing lanes and 12 fluid-load truck lanes. Salson can now process about 100,000 cartons. Read the Salson Logistics story.
Storage and Picking Layout
Storage and picking take up most of the floor in any distribution center design, and they decide most of the labor.
Separate reserve from forward pick when volume justifies it. Reserve storage holds full pallets or cases at density. Forward pick holds a small quantity of each SKU at an easy height, close to packing. Replenishment connects them.
Slot by velocity. Put the SKUs with the most picks closest to the start of the pick path and at waist height. Slow movers go higher, deeper, or into denser storage.
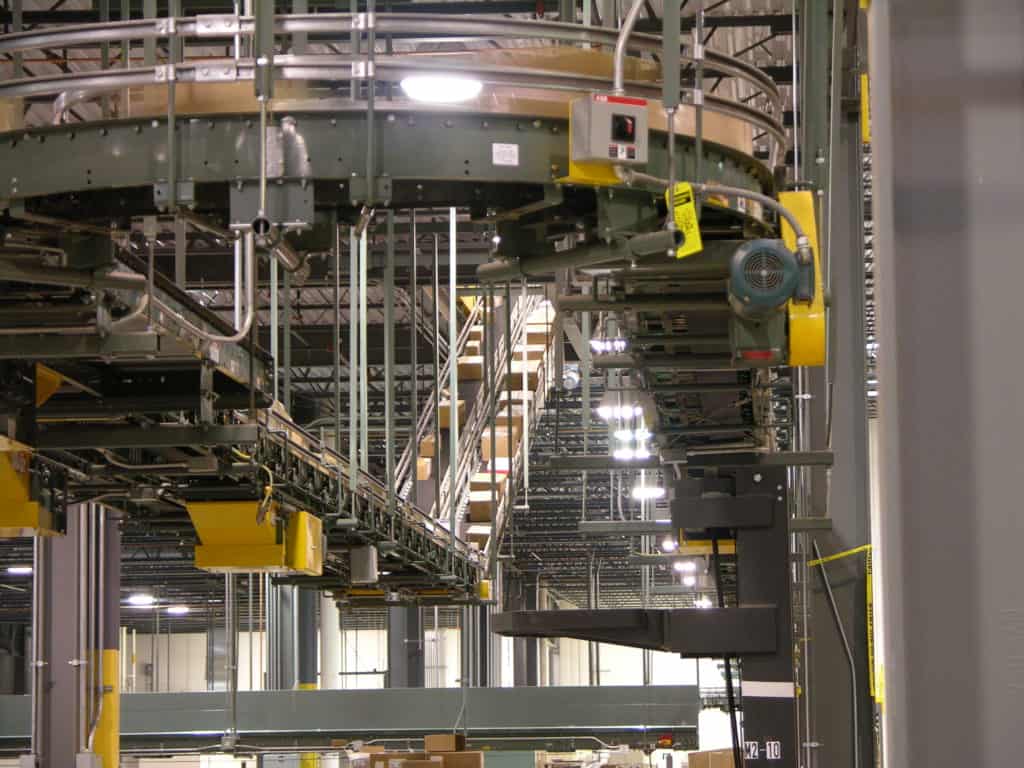
Use height. A building’s clear height is paid for whether you use it or not. Pick modules and mezzanines stack two or three levels of picking in one footprint, and taller rack holds more reserve stock. Plan conveyor between levels at the same time, because incline, spiral, or vertical conveyors need floor space and headroom of their own.
Match aisle width to the equipment. Narrow aisles hold more storage but need specific lift trucks. Wide aisles cost space but work with standard equipment. The choice affects the whole storage plan, so make it before the rack layout is drawn.
Packing, Sortation, and Shipping Flow
The back end of the building turns picked items into loaded trucks. A strong distribution center design keeps this area from becoming the bottleneck.
- Put packing between picking and shipping, with takeaway conveyor feeding it and accumulation ahead of each station so packers always have work.
- Automate the repetitive steps. Taping, weighing, and print-and-apply labeling are good candidates once volume is steady.
- Sort to doors by route or carrier. A shipping sorter sends each carton to its outbound door or staging lane, so loaders don’t sort by hand.
- Size the sorter for your cutoffs. If most orders ship on one afternoon pickup, the sorter and doors have to handle that hour, not the daily average.
Some buildings skip storage for a share of freight altogether. Cross-dock flow moves inbound cartons through a receiving sorter directly to outbound doors. Century’s crossdocking solutions page covers that design.
A Full Distribution Center Example: Barnes & Noble
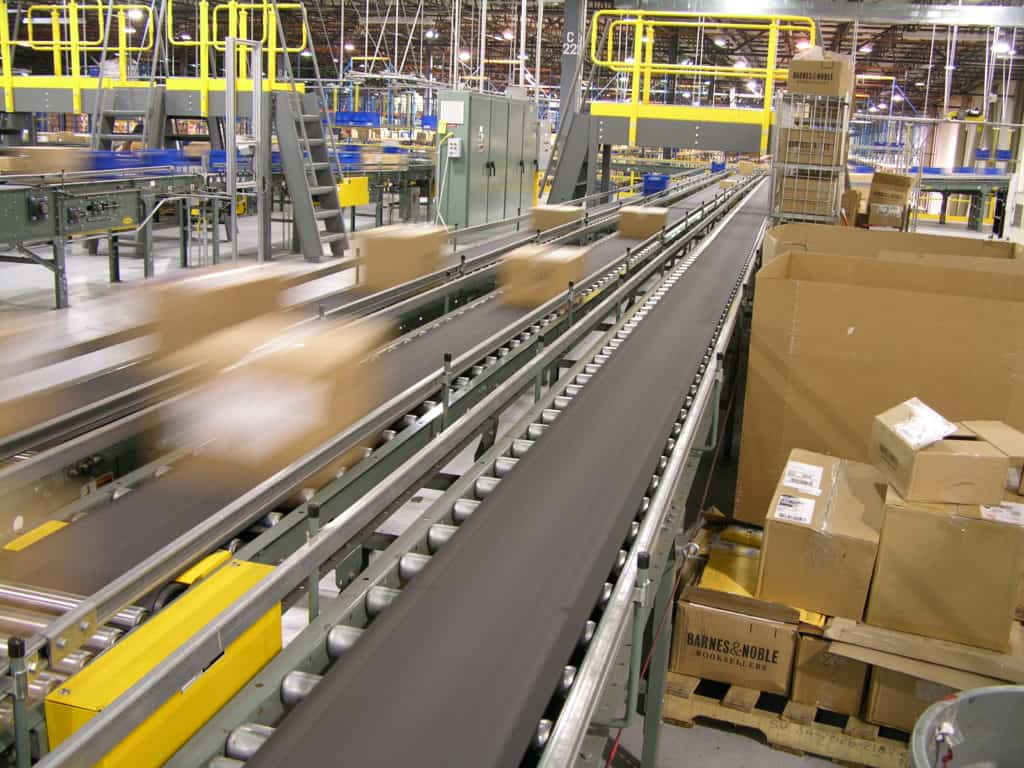
Barnes & Noble’s 1.2 million square foot distribution center shows every area working together. Century joined the design team while construction was underway, and the system was planned alongside the building.
- Receiving: tracking labels are generated and applied to cartons automatically. Less-than-pallet receipts are conveyed to a mezzanine above the receiving dock, scanned, and matched to purchases. A 380-foot shoe sorter sends cartons to receipt processing and audit stations, then back into the sorter for routing to pick locations, cross-dock, or active order fulfillment, at up to 140 cartons a minute.
- Storage: the building holds over 1 million titles, in storage ranging from high-rise narrow aisle pallet rack to flow rack to acres of multi-level shelving.
- Replenishment: conveyors and sorters deliver cartons from bulk storage or receiving to each of three levels, then to specific zones for put-away.
- Picking: eight three-level pick modules, with RF-directed batch picking and scanners and diverters that send cartons only to zones with picks.
- Packing: a tilt-tray packing sorter assembles orders by chute, and taping and print-and-apply stations seal, weigh, and label cartons.
- Shipping: a single-loop tilt-tray shipping sorter sorts up to 170 cartons a minute to shipping doors and small package Gaylord positions, with flexible extendible conveyors at the doors.
More than 13 miles of conveyor connect it all, monitored from a central control room. Read the Barnes & Noble story.
Common Distribution Center Design Mistakes
| Mistake | What happens | How to avoid it |
|---|---|---|
| Designing for the average day | Docks, sorters, and packing back up at peak | Size every area from peak-period data |
| Picking equipment before mapping the process | Expensive equipment that doesn’t match the flow | Finish steps 1 through 5 before choosing equipment |
| Too little staging | Freight spills into aisles and exit routes | Mark staging lanes sized for a full trailer |
| Backtracking flow | Extra travel and congestion at crossings | Arrange areas so product always moves forward |
| No growth space | A second building, or a costly rebuild, years early | Reserve floor, power, and clear height for future lines |
| Ignoring replenishment | Restocking blocks pickers at peak | Give replenishment its own aisle or the back of carton flow |
| Late fire protection and code review | Rack or conveyor moves after inspection | Bring sprinkler and code review into the layout early |
Safety and Code Considerations
A distribution center design has to meet building, fire, and workplace safety rules, and some of them shape the plan directly.
- Aisles and passageways. Where mechanical handling equipment is used, OSHA requires sufficient safe clearances for aisles, loading docks, and through doorways, and aisles must be kept clear and marked, under 29 CFR 1910.176(a).
- Exit routes. OSHA requires exit routes to be free and unobstructed, with no materials or equipment placed in them, even temporarily, under 29 CFR 1910.37(a)(3). Staging and conveyor lines have to be planned around them.
- Powered industrial trucks. Forklift aisles, crossings, and dock edges should be planned with the rules in 29 CFR 1910.178 in mind.
- Fire protection. Rack height, storage type, and commodity affect sprinkler design under NFPA 13, which your fire protection engineer and local authority will apply. Changing storage height or type after the system is designed can mean sprinkler changes.
- Conveyor crossings. Where people need to cross conveyor lines, plan gates, crossovers, or under-passes in the layout. Our conveyor safety guide covers guarding and stop devices.
This section is general information, not engineering or legal advice. Your building’s design should be reviewed by qualified engineers and your local code officials.
Redesigning an Existing Distribution Center
Most distribution center design work happens in buildings that are already running. The same distribution center design steps apply, with two added constraints: the building is fixed, and the operation can’t stop.
Phase the work. Century often recommends splitting a large project into phases that each automate one section while daily operations continue. Phasing breaks a large capital project into manageable pieces, makes approvals easier, and gives time to train, test, and measure each phase. Each phase is engineered to connect to the existing system and leave room for future lines. Our project phasing page explains the approach.
Reuse what still works. Existing conveyor can sometimes be removed, relocated, and reinstalled in a new layout, or interfaced with new equipment. A site audit tells you which equipment has life left.
Look up before you look out. In a full building, mezzanines and rack-supported structures add space without adding square footage.
Where an Integrator Fits in Distribution Center Design
Bring the integrator into distribution center design before the building is fixed. The flow plan affects column spacing, door count, clear height, floor flatness, and power, and those are cheap to change on paper and expensive to change later.
A design partner should be able to:
- Validate a site or building against your volumes before you commit
- Size the facility from past, current, and future needs
- Recommend equipment that fits your budget and footprint
- Provide AutoCAD layouts and, when it helps, simulation
- Keep the same engineers and project manager from concept through go-live
Industry groups such as MHI publish material on facility planning and material handling. The decisions that matter most in distribution center design, though, come from your own data and a layout that fits it.
What is distribution center design?
Distribution center design is the planning of a DC’s layout and flow: where receiving, storage, picking, packing, and shipping sit, how much space each gets, and which equipment connects them. The goal is to move product from inbound to outbound dock with the fewest touches and the least travel.
What are the main areas of a distribution center?
Most DCs have six: receiving, put-away and storage, replenishment, picking, packing and value-added services, and shipping. Many also have cross-dock lanes, returns processing, and offices or break areas that need to be placed without interrupting product flow.
What is the difference between U-shaped and through-flow layouts?
A U-shaped layout puts receiving and shipping on the same wall, so docks and staff can be shared and fast movers sit near both. A through-flow (I-shaped) layout puts receiving and shipping on opposite walls, which separates inbound and outbound traffic but makes every unit travel the length of the building.
How many dock doors does a distribution center need?
It depends on trailers per hour at your peak, how long each trailer takes to load or unload, and whether doors are shared between inbound and outbound. Calculate doors from peak-day data, then add staging space for freight waiting for a door or a truck.
How long does distribution center design take?
It depends on building size, how complete your data is, and how many revisions the layout goes through. Century’s typical project timeframe from start to finish is about six months, and design is one part of that. Having clean operating data ready shortens the design phase more than anything else.
When should I bring an integrator into a new building project?
As early as possible, ideally during site selection or before the distribution center design is final. Door count, column spacing, clear height, and power all depend on the material handling plan, and they’re hard to change once construction starts.
Can I redesign my distribution center without shutting down?
Usually, yes. Phasing the project so one section changes at a time keeps the rest of the building running. Each phase is designed to connect to existing equipment, and some existing conveyor can be relocated and reused.
Does every distribution center need automation?
No. Automation pays off when volume, labor cost, accuracy needs, or space limits justify it. A good distribution center design leaves room to add conveyor, sortation, or automated storage later, even if the building opens with manual processes.
Design the Flow First
Distribution center design is a sequence: data, process map, space, flow pattern, then equipment. Get the docks, staging, and flow right early, and the equipment decisions get easier and cheaper. Skip ahead, and the layout ends up built around a conveyor instead of around your orders.
Century Conveyor has been designing and installing distribution systems since 1981, from Salson Logistics’ automated receiving to the full Barnes & Noble distribution center. If you’re planning a new building, outgrowing the one you have, or deciding whether a site will work, explore Century’s system design services or contact our team to start with your data.